Brake drums play a crucial role in many vehicle braking systems. Over time, wear and tear can compromise their effectiveness, leading to reduced braking performance, vibration, or even failure. Regular inspection and proper measurement help ensure safety and prolong drum life.
This article will guide you through how to measure and inspect brake drums for wear, evaluate whether they can be resurfaced or must be replaced, and provide best practices for maintenance. When it’s time for replacement, you can buy Brake Drum online.
Why Inspect & Measure Brake Drums
Brake drums are subject to friction, heat, and mechanical stress. Common factors that cause wear include:
-
Repeated brake shoe contact leading to surface grooves and scoring.
-
Overheating from heavy loads or excessive braking.
-
Corrosion or pitting from moisture, road salt, or contaminants.
-
Out-of-round deformation due to heat cycles.
Regular inspection can prevent safety risks such as: uneven braking, brake fade, noise, or longer stopping distances.
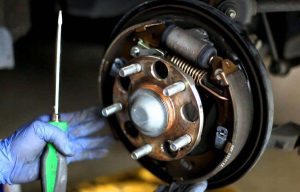
Visual Inspection Checklist
Before using tools to measure, perform a visual and tactile inspection:
-
Check the inner friction surface for deep grooves, scoring, or ridges.
-
Look for cracks, especially near mounting flange or bolt holes.
-
Inspect the wheel mounting surface and bolt hole area for damage or ovality.
-
Check for rust or pitting inside or outside the drum.
-
Remove the drum and examine the brake shoes for uneven wear or embedded particles.
-
Verify condition of wheel cylinder or other brake hardware, checking for leaks or corrosion.
If you spot severe damage or structural issues, replacement may be the safest option rather than resurfacing.
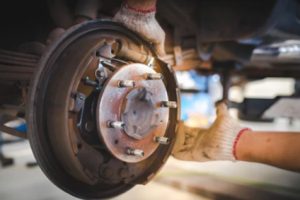
Measuring Brake Drum Wear: Tools & Preparation
To correctly measure drum wear, gather the following tools and prepare the workspace:
| Tool | Purpose |
|---|---|
| Micrometer (caliper type) or drum inside diameter gauge | To measure inside diameter accurately |
| Vernier caliper or outside micrometer | To measure thickness or flange dimensions if applicable |
| Brake drum specification sheet / manufacturer manual | To know allowable wear limits and safe dimensions |
| Clean rag & brake cleaner | To remove dust, rust, and debris prior to measurement |
| Straight edge or dial indicator (optional) | To test for out-of-round or runout condition |
Preparation steps
-
Park the vehicle on level ground. If drum is still mounted, prevent the wheel from moving when measuring.
-
Clean the interior and mounting faces of the drum: dirt or brake dust can affect precision.
-
Warm-up: Measure when the drum is cold; temperature expansion can alter measurements.
-
Secure the drum for measurement or remove it and place on a flat surface for stability.
Measurement Procedure
Follow this step-by-step method to measure and evaluate the drum:
-
Measure the inside diameter
-
Insert the inside diameter gauge or use a micrometer/spindle to measure across multiple equidistant points (e.g. 4 or 6 spots at 60° intervals) to check consistency.
-
Record the largest diameter found (since wear usually increases diameter).
-
-
Compare with specifications
-
Check the vehicle manual or printed value on the original drum for maximum inside diameter limit.
-
If your measurement exceeds the limit, the drum must be replaced — machining or turning past this limit is unsafe.
-
-
Check for out-of-round (run-out)
-
Use a dial indicator: mount the drum onto its hub (or on a stand that mimics hub mounting) and rotate it slowly; measure run-out on the inside surface.
-
Excessive run-out (as per manufacturer spec) can cause vibration or uneven braking, warranting replacement.
-
-
Measure flange or mounting face thickness (if applicable)
-
Some drums have a specified thickness for bolt-flange or mounting face. If worn or damaged, the drum may not securely mount.
-
-
Check for material thickness / wall thickness
-
On some composite or vented drums, check minimum wall or vent dimensions. Wear or thinning in these areas may reduce heat dissipation and safety.
-
Evaluating Resurfacing vs. Replacement
Once measurement is complete, decide whether resurfacing (turning / machining) is viable or replacement is mandatory:
| Condition | Action | Reason / Comments |
|---|---|---|
| Inside diameter < maximum spec by safe margin | Resurfacing allowed (if no cracks) | Maintains safe thickness after machining |
| Inside diameter > spec or deep grooves / heat cracks present | Replace drum | Safety margin lost; machining not safe anymore |
| Minor surface scoring / light rust | Light machine on lathe, if within spec | Restores smooth contact area |
| Excessive run-out despite machining | Replace drum | Geometry compromised; machining won’t fix warping |
| Damage to mounting flange or bolt holes | Replace drum | Secure wheel attachment compromised |
Always reference manufacturer’s service limit for your specific vehicle — this varies depending on make/model/drum design.
Maintenance Tips Post-Inspection
Proper maintenance after inspection helps prolong your brake drums’ life and avoid uneven wear:
-
Replace brake shoes in pairs (both sides of axle) when servicing drums.
-
Use quality cleaning solutions (non-oil based) when cleaning drums & shoes to prevent contamination.
-
Avoid overheat stress: during towing or steep declines, use engine braking and avoid “riding” the brakes.
-
Maintain wheel cylinder and brake hardware to prevent brake fluid leaks that can corrupt drum surface.
-
Store spare or removed drums in dry environments to prevent corrosion or pitting.
When & How to Replace Brake Drums
Signs you must replace: measurement over spec, cracks, irreversible deformities, or out-of-round beyond tolerance, even after machining.
Steps for replacement:
-
Acquire the correct replacement drum (matching model, size, bolt pattern, offset). Use a reliable parts supplier and ensure specification accuracy.
-
Install new brake shoes if required; fit any new hardware (springs, clips).
-
Torque hub and wheel bolts to manufacturer’s specification.
-
Bed in new shoes and drums: several moderate braking applications to achieve proper surface contact & heat cycle.
-
Re-check for run-out and performance after test drive.
You can conveniently source compatible and certified replacements when you buy Brake Drum online.
Summary Table: Visual & Measured Indicators for Intervention
| Indicator Type | What to Check | Action if Not in Spec |
|---|---|---|
| Visual / Surface | Scoring, cracks, pitting, rust | Replace drum / clean & resurface if shallow and spec allows |
| Inside Diameter Measurement | Measured value vs spec max | Replace if over spec; resurface if under and viable |
| Run-Out / Roundness | Dial indicator reading | Resurface if slightly off; replace if severe or non-correctable |
| Hardware Condition | Wheel cylinder leaks, worn springs/shoes | Repair hardware, flush fluid, inspect all parts |
| Brake Performance | Vibration, noise, reduced braking | Diagnose; inspect drum & shoes for wear or damage |
Conclusion
Proper inspection and accurate measurement of brake drums is essential for safe and effective vehicle braking. By following the outlined process — combining visual checks, precise tool measurements, and evaluation against manufacturer specs — you can detect early wear, decide whether to resurface or replace, and maintain optimal braking performance.
When replacement is necessary, choose quality, specification-correct parts from trusted suppliers. Don’t compromise on safety. Visit the linked source to buy Brake Drum online as needed.
A meticulous inspection routine not only extends the life of your brake drums but also ensures smoother, safer driving under all conditions.